Bulk Herb Store – Articles – Bentonite Clay Toothpaste.
27 Friday Apr 2012
Posted in Natural Health

27 Friday Apr 2012
Posted in Natural Health
12 Thursday Apr 2012
Tags
corn syrup substitute, fruit dip, homemade, invert syrup, italian meringue, marshmallow creme, marshmallow fluff


Jet-Puffed Marshmallow Creme. Marshmallow Fluff.
Not something I use often, as in “rarely!”, as in . . . I can only think of one time in my cooking years that I’ve ever used either one! 🙂 Specifically, for an awesome cashew caramel fudge that I made for my special guy several years ago.
And not something I ever plan to use again. It’s full of chemicals and “non-food”, and besides that – I’ve got something better now! 🙂
I find that my brain has lately been noting and keeping track of various different elements related to marshmallow creme.
Several months before Christmas, I read a healthy makeover of the “back of the box” Marshmallow Fluff fudge on Cheeseslave’s blog. This makeover involved making your own homemade marshmallow fluff, using an egg white or two, and it looked so easy! But I never got around to making fudge for Christmas. 😦 Info was noted however (and bookmarked).
Over the intervening time, I’ve read several other recipes for making marshmallow creme at home. For one thing, I’ve discovered that it’s basically the same thing as Italian Meringue, but uses corn syrup instead of hot sugar syrup. Noted again.
I already knew that the recipe I grew up with for making pancake syrup, with one small tweak, could be successfully substituted for corn syrup (see recipe below). I only recently found out that what we’d been making all these years is basically homemade invert syrup! Again, noted (with glee! love it when I find out I’ve been doing something awesome without even knowing it! :D).
I’ve also lately been noting several interesting recipes on food blogs I follow and through Pinterest that call for marshmallow fluff. One I’ll share later because it’s what I used some of my marshmallow creme for last nite! 🙂
Then, a couple days ago I made up another batch of my wonderful homemade mayonnaise (that I must share with you all another time; it’s SO good!), which left me with some leftover egg whites.
The time was ripe for marshmallow creme! 😀
So I made up a batch of syrup (takes all of about 5 min or so). (see below for the recipe)
And literally whipped up a double batch of marshmallow creme, in about 10 min or so, adapting Cheeseslave’s recipe for “How to Make Marshmallow Fluff Without Corn Syrup“. It made enough to equal 2 of those 7 oz jars you’d buy in the store! All for the cost of 2 egg whites, 1 C of organic sugar, 1/2 tsp cream of tartar, a pinch of salt and 1 tsp of vanilla. Not bad!! 😀

So what was I going to do with all of this marshmallow creme??
One of the recipes I’d read for using “fluff” was Brown Eyed Baker‘s Fruit Dip. Since I have a whole 3 pound log of cream cheese sitting in my fridge, this was a no brain-er as my first adventure into fluff-dom. 😀 This recipe uses TWO ingredients. It’s super easy to make, and pretty darn good on some sliced apples! The only thing different I did was use my mixer to beat it all together, and added about 1 tsp of fresh lemon juice.

I froze my other “jar” of fluff, and may eventually one of these days venture into the culinary wonders of a “Fluffernutter” sandwich (which I’ve never had!) and fudge. 🙂 There’s also whoopie pies! and a whole host of freezer pies (so I’ve discovered).
Below are my recipes for the cane syrup and my adaptation of Cheeseslave’s marshmallow fluff recipe.
Combine all three ingredients in a small saucepan, and heat over medium-high heat, stirring constantly, until the mixture turns clear – which will be about the same time it reaches a rolling boil.
Without stirring, allow mixture to boil for 2 min (3 min would be better at sea level or low altitudes), then turn off heat, cover saucepan tightly and allow to rest for at least 10 min (this will allow the condensation to melt any crystals on the sides of the pan and prevent crystallization of the syrup). Use as needed, store leftovers covered tightly in the fridge. This has kept for me in the fridge for 3-4 months at least.
This amount made about 9 oz of syrup for me (at over 6000 ft above sea level). Amount yielded will depend on how long syrup boils, altitude, and humidity.
Put egg white and salt into a deep bowl and whip on “high” until fluffy and opaque, just short of “soft peaks”. Reduce speed to medium and pour syrup into the side of the bowl (away from beaters so it doesn’t splash) while continuing to beat. Continue to beat for 7-10 min, gradually increasing speed to “high”, as tolerated by mixture (so as not to sling it all over your kitchen!).
When the mixture has reached a marshmallow fluff consistency (yes, it will become thicker and more viscous the longer you whip it), add in vanilla if using. Beat for a few more minutes to combine and bring fluff back to a fluffy consistency.
Store covered in fridge, this will probably last for a few days. You can also freeze it, just stir to recombine if it shows separation when defrosted.
Posted by nurishingnuggets | Filed under Recipes
04 Wednesday Apr 2012
Posted in Recipes
Tags

Now, to be honest, I *did* look up fruit butters in my old Joy of Cooking recipe book before I started; and I looked up Pear Butter online to get a feel for what sorts of spices people seemed to enjoy with the pears. It also familiarized me with the general ratios of sugar to fruit, etc. (It’s also where I got the wrong-headed idea to use ginger, but it didn’t turn out to be too bad of a blunder). 😀
But that’s me . . . I love reading recipe books and have done it for years. I find that the more familiar I am with the general way of things, the more freedom I have in the kitchen to adapt and go with what works for me/what I happen to have on hand. With this pear butter, I didn’t have pounds and pounds of fruit, so I just adapted. 😉
Oh, and I’m sorry that I don’t have pictures of the process. I made this before I decided to blog on it! There are pictures of the finished product, tho’. 🙂
Pear Butter:
4-5 medium to large ripe pears: Cored, peeled of the ugly parts and cut up into about 1 inch pieces. Leave as much of the peeling as possible (cores too if you want), it adds flavor and you can fish them out later. (These were organic Bartlett types that I got @ $1/7 or 8 of them on the “ugly produce” cart at my local organic veggie store)
2/3 Cup – 1 Cup organic sugar: I think I was closer to 2/3 C and added powdered Stevia extract to up the sweetness to where I wanted it when done.
Sea Salt: Oh, maybe about 1/4 – 1/2 tsp rough ground. Just enough to bring out the sweetness and give the whole thing depth of flavor. I really HATE those thin, shallow tasting dishes where your mouth is just getting ready to REALLY taste it . . . and you’re left hanging, realizing everything petered out on you. Blech.
Some ground spices: I threw in a palm-full of allspice, some cinnamon and some nutmeg. I also ended up adding ground ginger, but I’d probably leave the ginger out next time (don’t misunderstand me, I love ginger; just didn’t feel it in this batch). You *can* use whole spices, but I like the flecks of ground spice in fruit butters.
Splash of lemon juice: this brings out the flavors and gives a certain freshness to the final product.
About 1/2 inch of water in the bottom of the pan. Just to keep it from scorching and to help the fruit break down more.
Put your pan on the stove @ roughly medium heat (I have an electric stove), and bring to gently rolling boil, stirring occasionally to keep from sticking/burning. Feel free to turn this down some so it doesn’t burn. You’re just trying to bring it to a gentle bubble so the fruit can cook down and break down.
Occasionally over the next few hours, you’ll want to stir this vigorously to help the pear pieces breakdown. Depending on how “chunky” you’d like your ultimate pear butter to be depends on how much you work to break the fruit down. You’re gonna keep cooking this over low to medium heat until the pears are all cooked through, the pieces break down, and you can easily fish out the skins and cores left in there. Go ahead and do that at this time.
After a few hours (most likely, depending on the heat of the stove, how much sugar you used, the ripeness of the pears and the humidity in your kitchen), this mixture will reduce down, and should start to thicken up and get deeper in color.
Add 1/2 teaspoon of vanilla at this time. (You don’t want to add it earlier ’cause it’ll just cook off).
Keep cooking and stirring, watching it carefully as it thickens.
It’s ready when you can put a small blob on a chilled saucer and let it sit for a few minutes without seeing a ring of liquid separate out around the edges. If you see a ring of liquid separating around the edges, then you have longer to go. Once there’s no separation, you’re ready to put it in jars. Just turn the heat off and leave the hot mixture in the pan.
In the meantime (or during those hours before hand), prepare some jelly jars. I re-purposed some old jelly jars, with seal-able lids. This amount mostly filled two 8 oz jars for me. You’re free to use new mason jars or re-purpose jars yourself, if you want to. It doesn’t really matter; you’re not going to be water bath canning these. Just make sure they’re very clean. (If you were going to water bath can for long term storage, it would be best to look up instructions on water bath canning and follow those for this last section).
To prepare them, you’re gonna need to bring your very clean jars and lids to boil in a pan of water to cover. Boil vigorously for about 10 min, then turn the heat off and just leave them in the hot water until you’re ready to fill them. If it’s been a long time since they came to boil; once the pear butter is ready to jar, just turn the heat under the jars back on, and bring the water back to a boil.
Once everything is ready and hot, I set out a brand spanking clean tea towel on a counter, and using clean tongs, fish out my sterilized jars, drain them well and place the hot jars mouth up on the tea towel. Quickly but carefully, spoon the hot pear butter into the prepared jars, leaving about 1/4 inch head space (between the top of the pear butter and the very top of the glass jar). As you’re filling the jars, poke the spoon down into the mixture a time or two to get rid of bubbles and make sure you’re really filling the jars. When you get the jars filled to about 1/4 inch from the top, clean off the top and threads of the jars with a clean cloth dipped in the hot water. Fish out the lids, shake them dry then quickly screw them tightly onto each jar. Finally, turn your jars upside down on the tea towel . . . and just walk away. 🙂
You’re going to let them cool down completely upside down like that. Over the next few hours, you may (probably will) hear popping as the lids seal with the cooling process. For things like jelly and jam and fruit butters, if you’ve really well sterilized your equipment and your mixture is piping hot when you pour/spoon it, this lid sealing *should* be adequate “canning”. However, you know your kitchen and what you’re comfortable with, safety-wise. To be on the safe side, you can either keep these jars refrigerated, or do the water bath canning mentioned earlier. DEFINITELY!! if your lids don’t “pop” and they aren’t dipped in at the top – REFRIGERATE them, and eat them first. They are not sealed!

Not the prettiest, but quite tasty!
In my kitchen, it’s only me and I don’t want things to go bad before I can get to it, so even tho’ I’ve been doing this sort of thing for ages and I feel safe with the cleanliness of my process, I just put both of my tall slim jelly jars in the fridge.
Now you have some very yummy, spiced pear butter – ready to slather on fresh bread and butter, and enjoy the fruits of your labor. 😀

04 Wednesday Apr 2012
Posted in Homemade Home, Recipes
Tags

Wholesome goodness
So this might seem a bit silly, but as I was compiling and constructing my breakfast, surveying the bounty before me . . . I got really excited about it, and wanted to share! 🙂
See that picture up there? It’s almost all homemade, from scratch.
1 – The YUMMY bread: my second loaf of this SUPER easy, very yummy recipe – Crusty Bread. This is a picture of my first loaf: 
It’s not exactly Nourishing Traditions approved (you know, white flour and all), BUT I used unbleached, unenriched white flour and since it sits for more than 12 hrs before baking, it’s most certainly “soaked flour”! That counts. 😀
That yummy stuff slathered on the bread?
2 – Homemade pear butter! and organic cultured butter. 🙂 (I’m out of pastured butter right at the moment.)
I don’t have a “recipe” for the pear butter . . . I just sorta winged it. But I can tell you what I did, if you wanted to sorta wing it yourself. 🙂 I’ll put that in the next blog or two. 🙂
3 – A big slab of oh-so-healthy-for-you grass-fed, Kerrygold cheese! This is Dubliner, I believe. LOVE it! 🙂
-sv_FINAL_-465x412.png)
If I wasn’t eating Kerrygold, I’d be eating one of the many raw cheeses that I can get at Whole Foods. Such a blessing to have access to raw cheese there! (since I don’t have access to raw milk at the moment)
4 – Orange-sicle Smoothie!
YUMMM! This started out life as a “creamsicle” (still have several of those in my freezer, in fact). Then, it was going to become an ice cream base. Then it was reframed to a smoothie. AND, to be honest, once I got done with that – it was more like a creamsicle icecream! 😀 But whatever you call it, it’s very yummy, and very good FOR you!
This is what I did:
I blended this all up together – using my brand new stick blender that I got for my birthday! Thank you very much P&G! 🙂 Then put it in the freezer in a bowl. My intention was to go through the steps for making ice cream without an ice cream maker (I’ll introduce you to that one once I accomplish it successfully! :D) but instead just left it in the freezer over night! lol
Sooo, for my smoothie/ice cream, I brought the mix out of the freezer and let it thaw enough to be able to break it up into pieces, put a bunch of this in a blender cup, added some extra half-and-half, a bit more stevia (sweetness is less “sweet” when something’s frozen), some more sea salt (helps with the perception of sweet and gives it that rich depth of flavor) . . . and went to town! I ended up with a big cup of what basically turned out to be orangesicle soft-serve! lol

Orangesicle Smoothie
03 Tuesday Apr 2012
Posted in Recipes
Tags
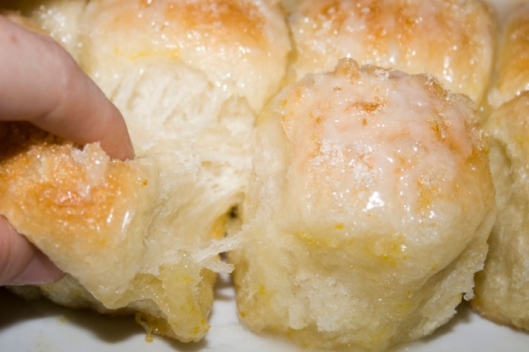
Lemon Monkey Bread « Bakerlady
This looks absolutely AWESOME!!!
And I have a sister-in-love who would LOVE these! 😀
The recipe calls for using Rhodes frozen rolls (which are pretty good rolls if you wanna go that way), BUT I think I’ll try these using my go-to roll recipe: The Pioneer Woman’s Cinnamon Roll dough recipe (she also uses the same recipe for her hot cross buns)
Enjoy!!
Update: I did make this using PW’s cinnamon roll dough, and it turned out very nicely! 🙂 But there wasn’t enough of the “stickiness” that I associate with monkey bread, so next time I think I’ll roll the pieces in butter and then in the sugar and pour the leftover butter and sugar over the top. It’s Definitely YUMMY!
02 Monday Apr 2012
Posted in God's Lessons
Tags

Desert Sunrise - Canvas of Light Photography
Forty-eight years plus 2 days ago, this life of mine began. (I originally started writing this several days ago, so it’s +5 days now. 😉 )
My birthday frequently makes me feel a bit reflective. This year, for some reason, I’ve been feeling my age. I’m almost 50. That’s . . . not young anymore. That’s grand-mother age. That’s officially “old maid” territory. *sigh* :-s
I’ve also been thinking a lot about my mom at this age. For some reason considering my mom at oh, say 28 years old, doesn’t have much of an impact on me. That’s in long-ago memories when mom was always there, and not necessarily a separate person from me. 😉 But mom at 48 is my “recent past”, in my adult memories. I was a year away from starting my personal venture into yuppy-dom when my mom was the age I am now.
At 48 years old, Mom had a daughter in her 4th year of college and one in her 3rd, a son in his senior year of high school and one finishing up junior high. She’d graduated from college and a diploma nursing school, working in one of those “newfangled” Intensive Care Units for a year while her fiancee finished college. She’d gotten married and for her honeymoon moved half-way across the country to train with a ministry that didn’t house married couples together (!). They decided that ministry wasn’t an open door for them, by the way. 😀
When I was born, she was a pastor’s wife. She started her career as a missionary and missionary’s wife with a 1 year old and a 3 month old. She’d birthed her two youngest in overseas hospitals. She’d taught English classes and Sunday schools and been a youth director for national youth. She home schooled her daughters. She’d helped create and start a medical center and an English speaking Christian grade school in two separate countries. She’d worked to support her husband through seminary (and 3 kids through a private Christian school, now that I think about it). She’d been team treasurer on the mission field, housed and hosted many visitors and groups from the USA and developed a reputation for being a wonderful hostess, being unendingly creative and a wonderful cook!
I was really struggling as I thought about all my mom had accomplished at my age. What is my life, compared to that? What has my life amounted to compared to most people my age? In many ways, it often feels as though my life came to a standstill before I turned 28. In actual fact, I was 26 when I hit the wall of CFIDS (Chronic Immune Dysfunction Syndrome; I’ll share about my journey with CFIDS another time, probably many other times ;)). From that point on, my life has been much less than I ever anticipated; much less than I had ever planned. All of my big dreams as I looked forward to the bright horizon of my life “beyond college” and “once I was done getting ready to live life” . . . frozen in time.
That day, on my birthday, the Lord blessed me in two distinct ways as I ruminated on these thoughts. Firstly, I opened the birthday card from my Mom and Pop . . . and ended up in tears. 🙂 Let me share with you a few of their words that encouraged me at just the time I needed to hear these specific things:
“From the very beginning we knew that God’s plan for you was not just for an ordinary life.” (I would have been happy with an ordinary life, Lord.)
“As you celebrate another year of life we pray that you will find great joy in discovering His plan for each day [emphasis mine].”
“. . . you are greatly loved and treasured . . .”
I so much needed those words at just that time, and the Lord knew just the right time to deliver them to me. 🙂 Words of appreciation, maybe seemingly so ordinary and mundane, or unadorned; maybe thought to be worn and over-used, can be such jewels in someone’s life at just the times the Lord knows they are needed. Speak out loud those “warm fuzzy feelings” to the people around you. You have no idea the balm it may be to an unseen heartache!
The Lord also spoke in a special way to my heart and my mournful thoughts in His compassionate and loving care later in the day, by causing me to think about Moses.

Bullrushes
Well, he didn’t start out that way! hehe He started out, humanly speaking, earmarked for the slaughterhouse. But God intervened and placed him in the lap of luxury, raised as the princess’ son. He was trained up and curried and “bent” to be Egyptian royalty. I don’t know if this was true of the Pharaoh at the time of Moses, but remember that for many hundreds of years, the Egyptian Pharaohs were considered directly descended from the Sun god. This was the environment, the expectations, the “world view” in which Moses was raised; this was what he grew up to expect. For the first 40 years of his life! (give or take a few before he was weaned) He had grand expectations for himself, and of himself. We can see this just from the biblical account of how he conducted himself – and tried to direct the conduct of those around him – in those events that led to the sudden change in his situation. He hit the wall, too – the wall of being an outcast.
And for the next FORTY years of his life, he lived the *exact* opposite of all that he’d grown up to know, all that he’d anticipated, all that he’d trained for. He was an outlaw and an outcast in the wilderness. He’d gone from being among the highest in the land in one of the most powerful nations of the world; to scraping out an existence in the desert. Not only that, but he’d gone from being royalty, to herding sheep! Egyptians despised herdsmen; they were the lowest of the low in Egyptian society. And there Moses was – in the ultimate humiliation, for what would amount to a full half of his lifetime by the time God called him out of it.
Scripture doesn’t tell us this, but I have to think that Moses must have spent time wondering at and pondering the apparent fickleness of Providence, that would grace him with such luxury and honor in the first 40 years of his life, with all the apparent advantages and useful platforms from which to influence for good and make a difference for his kinsmen, the Jewish slaves (for remember, this was part of the problem in the first place; he knew this). Maybe there was anger and grief and depression too. (We know he had a temper; it ultimately banned him from entering the Promised Land.) I’m sure he went through many, many permutations of any number of mindsets and thoughts in the hours upon hours that composed 40 years of herding sheep in the desert.
From Moses’ point of view, there was the uselessness of the first part of his life, and all the dead dreams of being “the one” to rescue his fellow Israelites. As far as he was concerned; where he was and what he was doing now was all that his life would ever amount to after that. He was married, he had sons, he raised sheep, and kept his nose clean on the backside of the desert. I wonder how much time he even spent contemplating Yahweh, since he’d married a pagan woman.
But from God’s perspective, these first 2 stages of Moses’ life were merely preparation and training for the GRANDE FINALE of the last 40+ years of his life!
In his first 40 years in Egypt, Moses had been trained in skills of leadership, given a formal education, learned diplomacy and foreign affairs, and grew familiar with the ways of court life.
In his second 40 years, he was refined in the desert school to learn humility and life at the ground floor level. Don’t forget, he learned that humbleness for which God recognized him, somewhere other than the Egyptian court. He learned the secrets of reading the land, of what it took to live off the land, of understanding what livestock (particularly sheep) need to live, and how those who live their lives with the sheep live, think, feel, interact.
And in the fullness of time, God moved: in the hearts of His people, in Egyptian affairs and in Moses’ life, bringing the three together in one of the grandest displays of God’s glory and might and unconditional love and care for an undeserving and ungrateful people ever recorded in history!!
So, just because I can’t see around the next sand dune, doesn’t mean that there was no meaning or purpose in my first 26 years; and doesn’t mean that these next 22 years have been for naught. It also doesn’t mean I’ll be picking sand out of my pita bread for the rest of my life. 🙂
02 Monday Apr 2012
Posted in Homemade Home

I wanted to share these great ideas for decorating Easter eggs that I discovered recently! But I’ve written this post 4 times now, with pretty pictures and links and quirky narrative, and the Internet elves have absconded with my content every time!!
So for now, I’m just going to post the links for 2 different methods of decorating Easter eggs that I find very intriguing (and new to me), and hopefully it will “hold” this time! 🙂
Update: Yea! I finally got the pics to stick so you can see a little taste of what I’m excited about. 🙂 Now, go forth, click away, and make beautiful things! 😀
Method One

Silk tie-dyed eggs, in process! this is not the final product! 🙂
Silk tie-dyed eggs. I first saw this on an email from Our Best Bites, a lovely blog with lots of yummy and creative ideas. I LOVE the pictorial tutorial, and you’ve just got to see how these eggs turn out!
Method Two

Lace eggs
Lace eggs. I saw these just today on Pinterest and followed it back to Martha Stewart’s blog. (She also has several other methods for decorating eggs listed at this site.) I just love the delicate, lacy look and how pretty all the different patterns look in a mono-chromatic scheme.
Ok, I’m going to see if I can actually post this now! and if it goes through, I’ll try to come back and link up some pics so you can get an idea of why I think these methods look so exciting. 🙂 (guess what? it worked! 😉 )
I’d love to hear if anyone tried these methods and how your eggs turned out, even a link to some pictures if you have them!
Has anyone tried other creative ways of decorating eggs, beside the usual dunk-them-in-food coloring method? 😉
27 Tuesday Mar 2012
Posted in Recipes
I have wonderful memories of summer times in southern California as a kid (well, at least 3 of them :)). At least one of those summers we took swimming lessons at a local high school. And it became a tradition to stop by the ice cream truck waiting outside every afternoon as we left. 🙂 Ahh, the memories of drippy hair, half dry swim suits, smell of chlorine, sweltering heat, and a popsicle or Drumstick. 😀 With those memories, I just had to share this post on how to make “frozen fudge” as she calls it, from one of my favorite food bloggers. It looks and sounds delicious! As I was reading it, I remembered that I have a whole set of Tupperware popsicle molds, leftover from the days when I used to be a Tupperware Dealer. I can make these! 😀 I hope you can make some soon yourself!

27 Tuesday Mar 2012
Posted in Uncategorized
Once again, I am venturing into the blogosphere . . . as a contributor.
Years ago, in the far distant past, I took my first baby steps into blogging on Yahoo! 360. Sadly, that realm no longer exists and along with it, has disappeared all of the wonderful contributions I made to the world by it. 😉 I hope the ether-net is benefiting from it now! 😀
I have missed the opportunity to express myself creatively. I’ve also been learning so many things about my great God and this wonderful world He has created for us to rule over, use, and benefit from. I long to be able share them with someone. 🙂
I don’t claim to be any great pundit or have any vast wealth of wisdom, or a polished style. Sometimes my days are pretty mundane. Sometimes the nuggets I share may seem overly sweet, some more bitter than sweet, and some needing more seasoning than others. 🙂 I’m just me, and I’d just like to share with you.
So welcome! I’m so glad you’ve stopped by. 🙂 My hope and prayer is that as you spend time with me in my corner of the world, you will find yourself nourished in some way by the “nuggets” I share with you.
Oh! and please feel free to stop by my About page and find out more about me! 😉
(I’m also brand new to WordPress, so please bear with me as I stumble around at first, learning the technical ropes. Translation: things may change-up from time to time for a bit here. 😉 )
